
The Web Audio API provides a powerful and versatile system for controlling audio on the Web, allowing developers to choose audio sources, add effects to audio, create audio visualizations, apply spatial effects (such as panning) and much more.

Web Audio API - MDN

Record Audio and Export to WAV files with Recorder.js

Recorder.js is a library for recording and exporting the output of Web Audio API. It can be installed using Bower using the package name recorderjs (not recorder.js, it’s another library). After installation, load the bower_components/Recorderjs/recorder.js file to your html file to use.

Note: inside the Recorderjs, there is another file named recorderWorker.js. You will need to specify the path to that file later in Javascript code. You should run this under an http web server, not through file:///.

In the HTML page, I have 2 buttons for start and stop Recording

<button onclick="record()">Record</button>
<button onclick="stop()">Stop</button>

Next, in the Javascript code, you need to add this to the beginning of your script file to fix the browser compatibility.

Read more
Update: I made a new better solution for this. You can read it here Using Gulp with Browserify and Watchify - Updated

Using Watchify instead of gulp.watch

If you are using Browserify with Gulp, perhaps gulp.watch is not the best solution when you want to watch for file changes and rebuild them as changes happen. gulp.watch cannot recognize the dependencies of each Browserify bundle so every time you save your file, Gulp have to re-compile all your Browserify bundles. watchify is a solution for this. Watchify will only re-compile the bundle if its dependencies change.

Using Watchify is very similar to normal Browserify. Watchify object is very similar to a Browserify bundle so you can take the code from Browserify to Watchify with very little change in code.

To use Watchify, take the Browserify code (you can read more in this post Browserify - Bring Nodejs modules to browsers), wrap it inside a Watchify object, add an on update event handler for it and you are done.

var browserify = require('browserify');
var source = require("vinyl-source-stream");
var watchify = require('watchify');

gulp.task('browserify', function(){
  browserifyShare();
});

function browserifyShare(){
  // you need to pass these three config option to browserify
  var b = browserify({
    cache: {},
    packageCache: {},
    fullPaths: true
  });
  b = watchify(b);
  b.on('update', function(){
    bundleShare(b);
  });
  
  b.add('./main.js');
  bundleShare(b);
}

function bundleShare(b) {
  b.bundle()
    .pipe(source('main.js'))
    .pipe(gulp.dest('./dist'));
}
Read more

web-mode for PHP coding

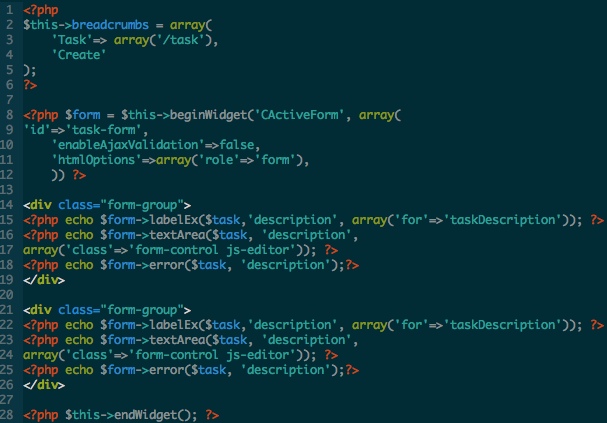
PHP code are usually mixed inside HTML markup code. It’s very hard for us to use only php-mode to indent both php code and markup code. However, with the help of web-mode, an autonomous emacs major-mode for editing web templates, you can achieve it easily. Here is the comparison pictures between 2 modes.

  • php-mode

php-mode

Read more

ReactJS uses a special syntax called JSX, not the normal JS one. Usually, when you want to work with ReactJS JSX files, you need to transform it to a normal JS file and then operate on that file. However, with the help of Reactify, a transform for Browserify, you won’t need to compile jsx to js files anymore, just use it directly from your code.

For example, I have two files: view.jsx and main.js. view.jsx contains the definition for React view and main.js is the website’s main script that loads the view through require().

  • view.jsx
var React = require('react');

var MyView = React.createClass({
  render: function(){
    return (
      <div>
        Example
      </div>
    );
  }
});
module.exports = MyView;
Read more

1. Bower

Bower is the most popular front-end package manager. You can install most of the front-end libraries from Bower. However, the biggest weakness of bower is that its functionality is just like a downloader. Each Bower package has a different structure and it is not a very good solution for us when we have to manually include the script files for each new library that we install. In this post, I will demonstrate the solution for that problem. This is not a fully automated method, only for the js part, but that still saves you a lot of time. Also, all the solutions presented in this post are defined in Gulp.

2. Install Bower packages with Gulp

Before processing to this part, make sure that you have Bower and Gulp command line installed already. You may need a .bowerrc file in your project root directory (or the directory that you want bower to run from), but this is optional. If the .bowerrc file is not presented, the default setting will be loaded. You can read more information about Bower configuration here.

Now we will create a Gulp task for installing the libraries describes in bower.json using the configuration in .bowerrc automatically.

var gulp = require('gulp');
var bower = require('bower');

gulp.task('bower', function(cb){
  bower.commands.install([], {save: true}, {})
    .on('end', function(installed){
      cb(); // notify gulp that this task is finished
    });
});
Read more

Basic Error Handling with gulp.watch

One of the most annoying thing when using the gulp.watch API is that it crashes whenever errors happen and you will have to start it again manually. Gulp system uses Nodejs Stream for automation, so you can use the events system of Nodejs Stream to handle error.

For example, I have the following Gulp task

var gulp = require('gulp');
var less = require('gulp-less');
var minifyCSS = require('gulp-minify-css');

gulp.task('transform-less', function(){
  return gulp.src('./*.less')
    .pipe(less())
    .pipe(minifyCSS())
    .pipe(gulp.dest('./dist'));
});

gulp.task('watch', function(){
  gulp.watch('./*.less',
             ['transform-less']);
});

If one of the source .less file contains syntax error, gulp will crash while watching these file. To handle it, simply add on('error') event after each time you pipe the stream to a plugin.

Read more

HTML5 Web Storage

HTML Web Storage is a way for web pages to store named key/value pairs locally, within the client web browser. Like cookies, this data persists even after you navigate away from the web site, close your browser tab, exit your browser, or what have you. Unlike cookies, this data is never transmitted to the remote web server (unless you go out of your way to send it manually). HTML5 Storage

There are 2 types of HTML5 Web Storage, Session Storage and Local Storage. Both of them exist as properties of window object and can be accessed as sessionStorage and localStorage. The methods of them are similar, too. The only difference is that objects stored in session storage will be cleared when the session expires while the ones stored in local storage are not. The same-origin rules is applied for both of them.

To store an object in the Web Storage location, use setItem(key,value).

// Store in session
sessionStorage.setItem("username", "tmtxt");

// Persist the data
localStorage.setItem("username", "tmtxt");

// Use JSON.stringify() to store JSON data
sessionStorage.setItem("json", JSON.stringify(myjson));
Read more

SockJS

SockJS is a Javascript library that provides a WebSocket-like object, allows you to create real-time, low-latency, full duplex and cross-domain communication. SockJS tries to use WebSocket in the background if the browser supports so the syntax is very similar to WebSocket object.

This post demonstrate a simple chat example using SockJS with NodeJS server. For other kinds of server, you can find it on the SockJS Github page https://github.com/sockjs.

SockJS include 2 parts, client-side SockJS and server-side SockJS. You need both for your application to run properly.

Server-side SockJS

The SockJS server will listen for all connection on port 9999 (you can change to whatever you want). Every time a client send a chat message to the server, it will broadcast to all other clients.

Create a new folder sockjs-server for your SockJS server. Create a file name server.js. First, you need to load all the required dependencies. Add this to your server.js file.

// Required packages
var http = require('http');
var sockjs = require('sockjs');
Read more

1. js2-refactor

This is one of the simplest refactoring library for Emacs. It is written entirely in Emacs and does not require any external program to work with. It is also designed for working with js2-mode, one of the best Javascript IDE for Emacs. If you haven’t known about js2-mode yet, take a look at this post Set up Javascript development environment in Emacs. Some noteworthy features of js-refactor are expand/contract functions, objects or arrays, lexical scope variable renaming,… You can easily install it using package.el.

M-x package-install js2-refactor

All the available functions of js2-refactor is available on github. Spend about 5 minutes to familiarize yourself with it https://github.com/magnars/js2-refactor.el.

2. Tern.js - Intelligent Javascript tooling

2.1 Tern.js basic

Tern is a stand-alone code-analysis engine for JavaScript. You can use Tern.js for these tasks

  • Auto completion on variables and properties
  • Function argument hints
  • Querying the type of an expression
  • Finding the definition of something
  • Automatic refactoring

There is an online demo that you can try at this link.

Read more
This post is the eighth part of the series Dired as Default File Manager

Color Files by extensions

Dired rainbow is an extension for Dired that helps you to colorize file names in Dired depending on the file types. You can install the package using package.el . The steps is really easy, just define the file extensions group and the color you want for that group. For example

(require 'dired-rainbow)

(defconst dired-audio-files-extensions
  '("mp3" "MP3" "ogg" "OGG" "flac" "FLAC" "wav" "WAV")
  "Dired Audio files extensions")
(dired-rainbow-define audio "#329EE8" dired-audio-files-extensions)

(defconst dired-video-files-extensions
    '("vob" "VOB" "mkv" "MKV" "mpe" "mpg" "MPG" "mp4" "MP4" "ts" "TS" "m2ts"
      "M2TS" "avi" "AVI" "mov" "MOV" "wmv" "asf" "m2v" "m4v" "mpeg" "MPEG" "tp")
    "Dired Video files extensions")
(dired-rainbow-define video "#B3CCFF" dired-video-files-extensions)
Read more