This blog post demonstrates how to config Google Analytics for Jekyll Bootstrap to monitor website view, user, traffic, etc. The manual on Jekyll Bootstrap site is not so clear and comprehensive for those who is new to Google Analytics and Jekyll Bootstrap.
Register for Google Analytics
First, you need to register a Google analytics account. Go to this link https://www.google.com/analytics/ and Sign In with your Google account. If this is the first time you use Google Analytics, it will ask you to create a new Google Analytics account. This is different from your Google account.
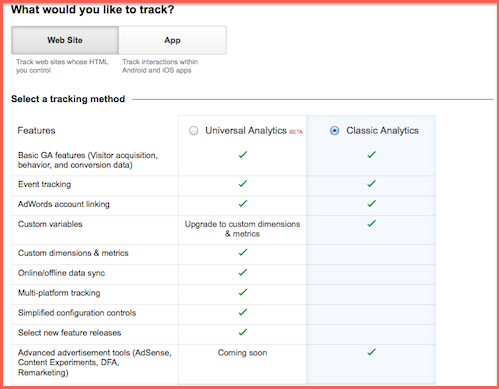
Select Website as the target that you want to track. After that, select Classic Analytics method.
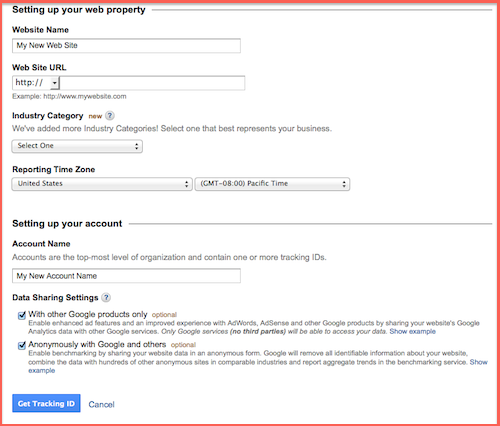
Scroll down and fill in the form some information about your website. When you finish, click Get Tracking ID button
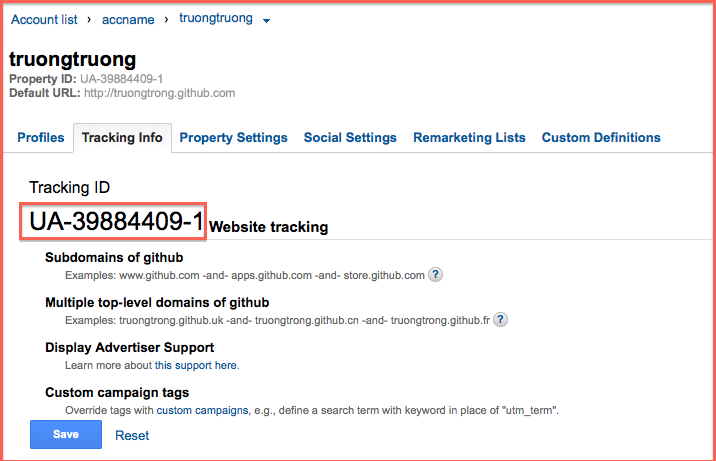
Now, you have finished registering for Google Analytics. Just leave every other config as default and copy your site Tracking ID and proceed to the next step.
Config Jekyll Bootstrap site
Open up the _config.yml file in your Jekyll site’s root directory. Find the analytics config and replace the default tracking_id with the one you’ve just registered.
analytics :
  provider : google
  google :
      tracking_id : 'UA-39878123-1'
Now just commit all the changes to github and you’re done. Come back to Google Analytics, select the Reporting tab and then Real-time report on the sidebar to see who is visiting your site.
Note: if you deploy your website to your own server, not Github, you need to run jekyll with –safe flag for Google Analytics to run properly.
$ jekyll --safe