Why I need a Log trace

There are many logging libraries for Clojure and Ring out there which support basic logging per each request that Ring server handles. However, all of them produce multiple log entries per request, one when the request starts and one when the request ends. Also, they cannot log the steps happen inside the handler function’s execution. For example, with Ring-logger, the default setup logs:

  • an :info-level message when a request begins;
  • an :info level message when a response is generated without any server errors (i.e. its HTTP status is < 500);
  • an :error level message when a response’s HTTP status is >= 500;
  • an :error level message with a stack trace when an exception is thrown during response generation

If there are multiple requests that process at the same time, the log entries in the log file could be something like this

  • Starting request 1
  • Starting request 2
  • End request 2
  • End request 1

That’s hard for me unite all the logs into one place and search the all the related log information whenever debugging one specific request. There is also no way for me to track the flow of execution steps inside the handler function of that request. Although I can simply do (timbre/info "Start some database queries"), the problem than come back to the previous one

  • Starting request 1
  • Starting request 2
  • Start a query for request 1
  • Start a query for request 2
  • Write file for request 2
  • Write file for request 1
  • End request 2
  • End request 1

Hmmm. Something like this would be much better

  • [1] Starting request {id}
    [2] Start query to database
    [3] Found one record
    [4] Processing data
    [5] Finished request {id} in 20ms
  • [1] Starting request {id}
    [2] Start query to database
    [3] Exception: database down
    [4] Finish request {id} in 10ms

What I want is one single log entry per request with the trace of its steps so I can easily find out how the code works as well as where it can break, where it doesn’t function normally.

Read more
Why React in place of D3?

So, I’m migrating my web app to full client-side rendering using React recently. The reason is that I mixed both server-side rendering and client-side render too much. At first, all the pages use server rendering (something like jinja2 template). However, as a consequence of the increase in interaction with user on the web app, I started to add more and more js code, which leads to the logic duplication in both backend and frontend. I decided to move all the rendering to React.js and that makes my life much easier dealing with all the DOM manipulation and two-way binding.

The only thing I need to deal with is the diagram that I implemented using D3.js before. I have been researching on the internet for a good solution and I was very closed to follow one of those tutorials, which suggests hooking D3.js rendering in React’s componentDidMount event (actually, most of the tutorials suggest that). Suddenly, one of my frontend friend recommended me throwing away D3.js for all those tasks. He said that React.js is very good at DOM manipulation stuff, why I have to mixed D3 inside that to lose all the flexibility of two-way binding, virtual DOM update,… Yeah, that sounds logical and I decided to give it a try, threw away all my old code and started in a fresh new React way. Of course, I didn’t D3.js completely, I still use it because of its supporting functions for calculating the diagram position and coordination.

Implement the Tree diagram in React.js

Okay, the first thing I need to do is to convert this old piece of code from D3 to React. The requirement is to draw a family tree like this. In contrast to my imagination, rendering the tree diagram using React is an amazingly effortless task.

Read more

This post is written entirely on iOS on my iPhone and iPad, from many places, at several times, in different situations.

  • So… You don’t blog very regularly recently.
  • Hmm, I don’t have enough time!
  • Too busy on work?
  • Nope, just enjoying the fun of the youth that I have missed for years :D

But…

During that, I waste a lot of time without actually doing any useful thing, mostly in waiting time, e.g waiting to my gf to be ready (oh the girl! 😅), waiting for my friends to come for a coffee or any other kind of waiting. I started to think about blogging on the go. However, the only thing that I have in thoses cases is my smart phone, an iOS powered one. And dealing with all those jekyll and git stuffs on a smartphone is really a big challenge.

Let’s make the impossible become real.

First obstacle: Git, of course

Coming from the terminal and Emacs world, I have never imagined how I would use git without them. But now I do :D

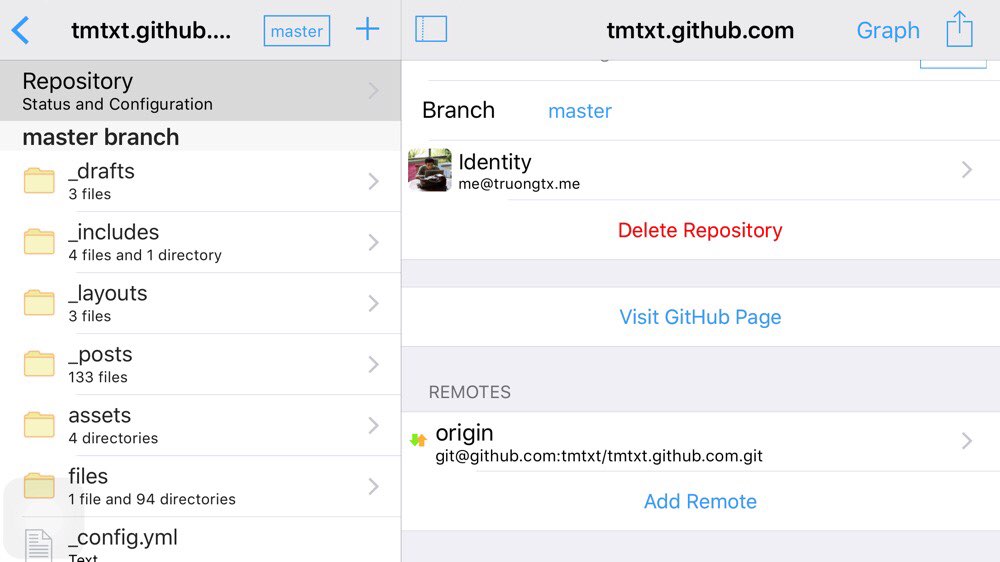
Working copy by Anders Borum is a quite good choice. You have the option to pay $14.99 in order to unlock the push feature. Actually, you have to pay. Who can use git without push feature :LOL:

For me, this’s quite adequate. All the steps to clone and push from Github are set up automatically, just input your credential and done. It just took me few minutes to get used to the UI. There are Git2Go at the same price, but I feel satisfied with this so I will leave Git2Go for the next chance.

working copy

Read more

Conkeror is not a browser for everyone. It lacks many features that are waiting for the users to implement :D One of the issue you may find annoying when dealing with modern websites is the permission management. In other browsers, when the web page want to access current location information or request for camera recording, the browsers will pop up a small prompt to ask the user for allowance. However, in Conkeror, there is no such thing. This is how to make that possible

Currently, there are 4 kinds of permissions available, there are

  • audio-capture
  • video-capture
  • geolocation
  • desktop-notification

They are managed by the XPCOM nsIPermissionManager service. You need to access that through nsIComponentManager like this

const permissionManager = Components.classes["@mozilla.org/permissionmanager;1"]
        .getService(Components.interfaces.nsIPermissionManager);

Next, we need a function for prompting the user for which permission to enable or disable. This function will prompt for user to select which permission that they want to modify from the permissionsList

// List of web api permission
var permissionsList = [
  {desc: "Audio Capture", value: "audio-capture"},
  {desc: "Video Capture", value: "video-capture"},
  {desc: "Geo Location", value: "geolocation"},
  {desc: "Desktop Notification", value: "desktop-notification"}
];

// read permission from minibuffer
var readPermission = function(I) {
  return I.minibuffer.read(
    $prompt = "Select permission:",
    $completer = new all_word_completer(
      $completions = permissionsList,
      $get_string = function(x) {return x.value;},
      $get_description = function(x) {return x.desc;}
    )
  );
};
Read more
Early Return in Clojure
  •  03 January 2016
  •  misc 

Okay
Okay
Okay…
It’s better that you break your function into smaller ones, each does one simple purpose. Clojure is functional, isn’t it?

I’m just kidding. Sometimes it’s really hard to write such that code. Consider this example, I have a function for validating whether a string is a valid date time string. If it’s nil or blank, just skip it, otherwise, try parsing it to see if it’s okay.

(defn validate-date-time [date-time]
  (if (nil? date-time) true
      (if (blank? date-time) true
          (try (f/parse formatter date-time)
               true
               (catch Exception e false)))))

Nested, nested and nested. If this is still simple and easy to see for you, try this one, need to check if the date time is between 1970 and 2030

(defn- validate-date-time [date-time]
  (if (nil? date-time) true
      (if (blank? date-time) true
          (let [date-time (f/parse formatter date-time)]
            (if (nil? date-time) false
                (if (before-1970? date-time) false
                    (if (after-2030? date-time) false
                        true)))))))

Ehhh…

Read more

Recently, I have been working with projects using docker on Mac OS using docker machine. However, docker machine currently does not support fixed ip address for the machine so that everytime the virtual machine boots up, it is assigned with a new ip address. That makes accessing the docker containers running inside the machine a bit annoying since I have to use docker-machine ip command everytime to retrieve the ip of that machine and connect using the ip like http://192.168.1.100:8888.

One simple solution for this is to define a fixed host name with the ip in the hosts file. This little shell scripts utilizes sed and tee to dynamically update the host name and ip of the docker machine everytime you boot up that vitual machine.

#! /usr/bin/env sh

# remove the old ip in hosts file
sudo sed -i "/\b\(hostname\)\b/d" /etc/hosts

# insert the new ip
echo "$(docker-machine ip machine-name) hostname" | sudo tee -a /etc/hosts

# set env variables
eval "$(docker-machine env machine-name)" OR $(docker-machine env machine-name)

You will need to replace hostname with the server name you want to assign to that docker machine and replace machine-name with the name of the docker machine.

This script will first find and remove the old entry that containing hostname in the hosts file. Next, it will append a new entry to the hosts file by evaluating the docker-machine ip command to get the new ip. Finally, updates all the environment variables for the current session for the docker and docker-compose to work properly. Keep in mind that you need to run this script using source for the docker-machine env command to take effect for the current shell.

Read more

In my previous post Using Gulp with Browserify and Watchify - Updated, I presented a solution for setting Gulp with Browserify and Watchify using vinyl-source-stream. However, that method is no longer working as Browserify updated to version 8.0.2. This post will demonstrate a new updated solution that has been tested on Browserify 12.0.1 and Watchify 3.6.0.

Structure

In my project, I will have to folder named js for containing all the source .js files and another folder called dist for outputing all the bundles after built.

├─┬ js
│ ├─┬ page1
│ │ ├── display.js
│ │ └── model.js
│ ├─┬ page2
│ │ └── controller.js
│ ├─┬ util
│ │ ├── validation.js
│ │ └── notification.js
│ └── page1.js
│ └── page2.js
├── dist
└── gulpfile.js
Read more

nvm is my favorite tool for installing and working with Nodejs. I can install several Nodejs versions on one machine for different projects without affecting each other because nvm can install Node locally (without root privilege) for each project user. However, since nvm is a collection of shell functions, it can cause problems for using it with non-interactive environments (for example in automation tools like Ansible).

I found some work around for it which I will present in this post. Some of them are a bit ugly but at least they solve the problem. I’m still trying to find the best solution and will post here when available.

Install Node with nvm

As I mentioned before, nvm is a collection of shell functions, so if you call nvm directly, you will receive the error saying that it cannot find the nvm executable file. I tried sourcing it in .profile and use the Ansible’s shell module but still got the error. Finally, I came up with the solution that is to source the nvm script directly everytime I need to run nvm using one specified shell (bash in this case). The Ansible tasks for installing Nodejs using nvm will look like this

# nvm_user: the user with .nvm install

- name: install nodejs using nvm
  sudo: yes
  sudo_user: ""
  command: bash -c '. ~/.nvm/nvm.sh; nvm install '

- name: set default node version
  sudo: yes
  sudo_user: ""
  command: bash -c '. ~/.nvm/nvm.sh; nvm alias default '
Read more

Neo4j and Emacs

Neo4j is one of the most powerful graph database. However, support for Neo4j in Emacs is still limited. Luckily, with the help of comint-mode, we can easily create a custom inferior shell for executing query and retrieving the result from a running Neo4j instance. This article from Mastering Emacs illustrates how to write your own command interpreter in Emacs. Based on that guide, I have developed a new package for Emacs to simplify the steps of composing and testing cypher query command. This post will summarize my experience and my setup to interact with Neo4j from Emacs.

Cypher mode

First, of course you need a major mode for displaying and editing the cypher query command. You can easily install it using package.el. The mode will automatically associate any files with .cyp and .cypher extension so you don’t need to do any thing after installing it. It also supports basic indentation beside the must-have syntax highlighting.

cypher-mode

Read more

Firewall on Linux server

I’m working on a project that uses Clojure. Usually, for these kind of project, I will open up an nREPL server for inspecting the web app while fixing bug. However, the problem is that the nREPL server seems to allow all kind of connections, from the local connections to the external ones without prompting for password. I also have a Neo4j instance running the graph database used for the website on another port and sometimes I need access to its web interface to look up the data inside the graph. That leads me to the need of setting up a firewall on my VPS to block all untrusted connections.

iptables seems to be the most popular firewall tool on Linux server out there. However, working with the complex iptables table rules through the command line can be a bit struggling. Fortunately, there is ferm, an utility tool that helps you maintain complex firewalls, without having the trouble to rewrite the complex rules over and over again. It allows the entire firewall rule set to be stored in a separate file, and to be loaded with one command.

Organize ferm with Ansible

Usually, the Ansible config for each project consists of some roles that is reusable among projects and the custom tasks for that project (as I mentioned before in this post Vagrant and Ansible - Organize for reusability). In order to apply that structure, we need to an Ansible role for installing ferm and generate a default config file for it. That config file should have some directives for including the per project config file. In each project, there will be some Ansible tasks in each project for defining particular firewall rule for that project.

Read more